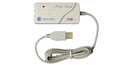
The USB-XD & USB-5 (or USB-X, USB) controller should be plugged into the USB port as instructed by the following driver installation steps.
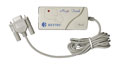
The ProE-X (or ProE) controller should be plugged into the serial port (com1 or 2) when the computer is powered off.
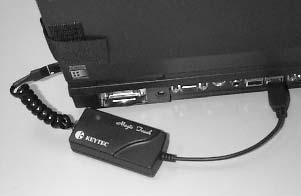
For add-on models KTMT-1214, 1500, 154W, 1700W, 1900W, 2200W and 2400W, and all the built-in touch screen models, connect the extension cable between touch screen and controller with white dots aligned.
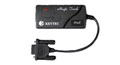
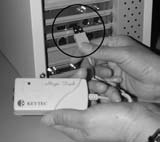
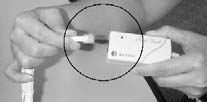
Connect the controller to computer. Plug the touch screen cable into the controller box.
If there is a previous Magic Touch driver or other touch screen’s driver installed in your system, uninstall them first. All Windows and Linux drivers are included on one CD, or they can be downloaded for free (except Mac version). Windows 2000 and XP Multi Monitor setup and examples are under the folder MultiMonitor 2K-XP. Mac driver CD is included only if you have ordered Mac version (USB-M or USB-WM).
Mac user: please see Sec. 1.3. for instructions.
Linux user: please see readme file in Linux folder for setup instructions.
1.1. For Windows: (Must logon with administrator’s password for Vista/XP/2000)
1.1.1. Vista: If you prefer to use Vista’s embedded tablet driver, DO NOT install Magic Touch driver from the CD. If you have already installed it, you must uninstall it first. Plug in the USB controller, Windows will find new hardware. The screen should respond to your touch, but the position may not be accurate. If you use ProE controller, plug in the controller before the computer is turned on.
1.1.2. Calibrate Vista tablet driver:
1.1.2.1. Right click the desktop, select “New>Shortcut”.
1.1.2.2. In the field “Type the location of the item”, key in the following phrase: %windir%\system32\tabcal.exe NoValidate, then click next. Note: it is important to key in the exactly same phrase with space after tabcal.exe, and make sure that the ‘N’ and the ‘V’ are capitalized, and that there is no space between ‘No’ and ‘Validate”. 1.1.2.3. In next window, click “Finish”, and you will now have a shortcut on your desktop labeled “tabcal.exe”
1.1.2.4. To calibrate, you can click and run the tabcal shortcut on the desktop to launch the calibration utility. Use the stylus supplied to perform calibration for better accuracy. Touch the center of the cross and release. Do not hold. Complete the 4-point calibration. Recalibrate if necessary.
1.2. Install Magic Touch driver on Windows OS:
1.2.1. Insert the setup CD. The setup window will display on the desktop. Click to select USB controller. Then click Install. (Vista may require your permission to allow setup to run.) Note: If setup window does not open, the CD-Rom’s autorun may be disabled. Click START\RUN to runthe setup from the driver CD. 1.2.2. For Win XP & 2000: When the system prompts “please plug in the Magic Touch USB to USB port”, plug in the controller. After Windows has found the new hardware, click OK to continue.
1.2.3. When “must reboot Windows to complete the installation” shows, click OK to reboot. (For Win 98 & ME, plug in the controller after reboot.)
1.2.4. After Windows is rebooted, two new icons are created on desktop.
Touch USB
Swap Button
1.2.5. Double click Touch USB icon to open touch control panel.
1.2.6. Click the Calibration button, choose either 5 or 25 point calibration and click ‘GO!’ To calibrate, touch and hold the center of each circle for a full second before lifting your finger. The circle will then progress to the next one until all 5 or 25 have been touched. Use the stylus to perform calibration for better accuracy. 1.2.7. Repeat the calibration if necessary. Click OK to close the window. 1.2.8. See 3. Settings and Options.
1.3. For Macintosh with USB port (a quick guide file is included in the CD)
Plug in the controller to USB port and plug in the touch screen cable to controller.
1.3.1. Insert the installer CD. Double click to open the Magic Touch CD icon.
1.3.2. There are 6 folders for OS 9.2.x, 10.1.x, 10.2.x, 10.3.x, 10.4x and 10.5x.
1.3.3. Open the folder that matches your OS version. (see Apple->About this Mac)
1.3.4. Double-click MagicTouch icon to run installation. If a LOCK icon appears on the lower-left corner, click and type in the administrator’s password.
1.3.5. After installation is completed, restart the computer.
1.3.6. Calibrate the screen: For OS 10.x, click Go\Application\Magic Touch Utility\Magic Touch. For OS 9.x, click Apple\Control Panel\Magic Touch Utility\Magic Touch. Before entering the calibration screen, you will be prompted for “lift-off” mode selection. (This appears as a checkbox in OS X) In lift-off mode the mouse click is activated when touch is lifted from the screen. Please see quick guide for details. Once the selection is made, the calibration screen is shown. (OS X: Press calibrate) Touch the centers of the 3 Xs with stylus provided (for better accuracy) to complete the calibration. Check the accuracy, repeat if necessary. Press cancel to exit.
Note: Although the Windows driver CD is normally not included with the touch screen sold as Mac version, the user can download all Windows and Linux driver for free.
If there is a previous Magic Touch driver or other touch screen’s driver installed in your system, uninstall them first.
All Windows and Linux drivers are included on one CD, and can be downloaded for free. For NT 4.0 & Linux user: please see readme file for setup instructions. Note: MUST logon with administrator’s password for Vista, XP, 2000 & NT 4.0.
2.1.Insert the setup CD. The setup window will display on the desktop. Click to select ProE controller. Then click Install. (Vista may require your permission to allow setup to run.) Note: If setup window does not open, the CD Rom’s autorun may be disabled. Click START\RUN to run the setup from the driver CD.
2.2.When “must reboot Windows to complete the installation” shows, plug in the ProE controller to a “free” Com port*, click OK to reboot. *Free Com port means there is no other device configured to use this Com port.
2.3. Win XP/2000: After reboot, the Detect New Hardware Wizard opens. Click next and continue anyway at Digital Signature prompt.
2.4. Two new icons are created on desktop.
Touch RS232
Swap Button
2.5. Double click TouchRS232 to open touch control panel. 2.6. Click the Calibration button, choose either 5 or 25 point calibration then click ‘GO!’ Touch and hold the center of each circle for a full second to complete the calibration. Use the stylus for better accuracy. Repeat the calibration if necessary. Click OK to close. 2.7. To use Vista’s embedded driver, please refer to 6.2.3.
3. Settings and Options of Magic Touch Control Panel (Windows version):
3.1. Mouse speed: Control the tracking speed of mouse cursor.
3.2. Double click speed: Control the time interval between two clicks to activate a double click. Slow speed makes double click easier. Test the double click by tapping the K logo twice. If successful, the logo rotates.
3.3. Lift Off: When this option is enabled, the click is activated when touch is lifted away from the touch screen. This mode is very useful for clicking hyperlinks, such as Internet browser, or programs that use “mouse-over” function. However, it is impossible to drag or draw in this mode. (available in Mac version) 3.4. Beep: Enable/disable an audible beep when a touch is sensed. Customize the beep’s pitch and duration under ‘Beep Options.’
3.5. Move only: Touching and dragging moves the mouse cursor without performing a click. This is only for an optional click pen (currently unavailable).
3.6. Hide cursor: Makes the cursor invisible (preferred for some applications).
3.7. Uninstall: Click to uninstall the driver. Correct password needed. (magictouch is the default password).
3.8. Default setting: Return the speeds and options to the original settings.
4. Touch screen functions:
4.1. Screen touched = left mouse button clicked
4.2. Touch down and drag = left mouse button held down and dragged
4.3. Tap twice = left mouse button double clicked
4.4. Swap Button: Select ‘once’ to right-click on next touch only, or ‘always’ to right-click on every touch. Select minimize to reduce to system tray as a shortcut.
5. Helpful Notes:
5.1. Place the monitor at an easy-to-touch position and avoid direct strong lighting to reduce glare on the screen.
5.2. It is easier to use the stylus for clicking smaller icons; dragging and drawing (apply constant pressure when drawing).
5.3. Make one-point touch only. Do not lean your hand on the screen or touch it with more than one finger or stylus.
5.4. Increase the size of icon and menu bar for easy touch. 5.5. If double-click is difficult, change to single click in ‘Tools\Folder Options’.
6. How to take care of your Magic Touch product:
6.1. DO NOT touch the screen with hard, sharp objects.
6.2. DO NOT hit or drop the screen.
6.3. DO NOT spray any liquid directly to the screen. Clean the screen with soft cloth or paper towel dampened with cleaning solution, such as Windex, alcohol.
6.4. DO NOT alter or substitute any parts.
6.5. Put the screen into the original packaging for storage and transportation.