The 1537L, 1739L and 1939L monitors are bezel-less open-frame touchmonitors. Optional front-mount bezels are available.
Refer to the dimensional drawing for cutout details; download the drawing in PDF format from the Documentation section of the 1537L, 1739L and 1939L web pages.
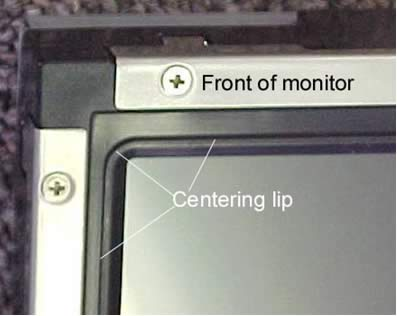
The base monitors are designed to be mounted from the rear and secured by slotted angle brackets with small mounting tabs. A slightly raised centering lip is intended to fit into the cutout in the front plate. Note that the corners of the centering lip are radiused. The radius for each monitor is given in the cutout dimensions, which are included in the dimensional drawing.
Everything outside the centering lip will be covered by the front plate of the enclosure.
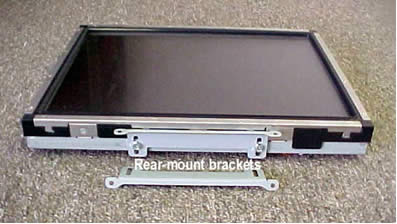
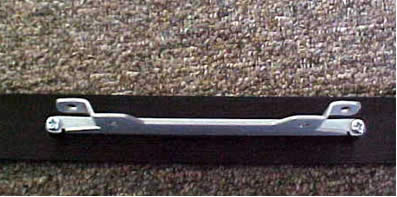
The mounting brackets are slotted to allow adjustment for front plate thickness. The brackets shown are intended only for rear-mount applications. They may be mounted to the top and bottom or to both sides of the monitor. The holes in the brackets then attach to the rear surface of the front plate. For metal front plates, professionally installed press-in studs should be used on the rear of the plate for a clean installation (no exposed fasteners). For wooden front plates, short wood screws may be installed from the rear side.
Optional front-mount bezels are available; see the Accessories section on the 1537L, 1739L and 1939L web pages for part numbers.
Refer to the dimensional drawing for cutout and mounting details; download the drawing in PDF format from the Documentation section of the 1537L, 1739L and 1939L web pages.
The front-mount bezel comes with brackets pre-attached to the top, bottom and each side.
The brackets have tabs that angle inward to attach to the monitor.
The monitor is placed on the bezel and the four brackets are attached to the monitor with the included screws. The optional front-mount bezel adds an extra 3/8" all around (approximately) to support mounting from the front side of the enclosure's front plate.
Now the monitor fits into the cutout in the front plate, from the front.
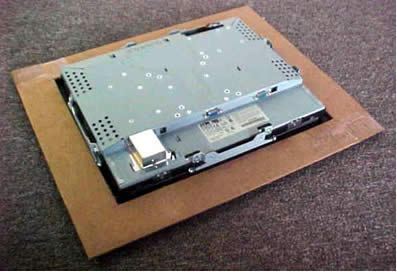
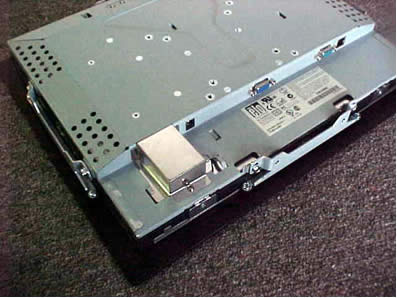
The picture above shows a rear view using a piece of cardboard to simulate the enclosure's front plate. Note that the specified cutout dimensions allow room enough for both the monitor and the offset front-bezel mount brackets to pass through.
NOTE: The rear-mount brackets pictured in the rear-mount section are not used. Special front-mount brackets are included in the front-mount bezel kit.
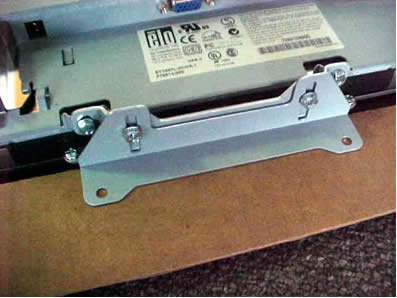
The special front-mount brackets attach to the tapped holes in the bezel mount brackets; these brackets then push up against the rear of the front plate and the screws are tightened on the slotted holes.
NOTE: The holes that secure the brackets to the front plate are outside the dimensions of the front bezel (the front bezel would not cover the screw heads if through-bolts were used). For this reason, professionally installed press-in studs should be used on the rear of the plate for a clean installation (no exposed fasteners) when using metal front plates. For wooden front plates, short wood screws may be installed from the rear side.